Surface Crack Detection
An experiment with deep learning to segmentation

Hey! How are you? I hope that well, dear reader. So, let’s go to another project?
I think this is the most interesting project I’ve ever done until now. Maybe because with it I learned python and deep learning. Well, this is the first project from the master’s degree with Deep Learning.
The goal was detection (somehow) surface cracks in tiles, ceramics, anything like that. The class received the dataset to this, and well… the dataset was s*cks (we’ll get there). For code and paper lovers:
- https://github.com/arthurflor23/surface-crack-detection
- Processamento digital de imagens para detecção automática de fissuras em revestimentos cerâmicos de edifícios (Digital image processing for automatic detection of cracks in buildings coatings)
Related Studies
First, let’s go to some related studies to look for similar projects and to understand which approaches are most used.
The paper “Multi-resolution approach for fine structure extraction: Application and validation on road images” give me this:
Threshold methods are popular and simple but inefficient (the amount of false positives and of false negatives is important). Methods based on Morphology reduce the number of false positives but they are strongly dependent on the choice of the parameters. Neural Network techniques are efficient but they need a learning step that is quite expensive and non-automatic. Finally, Multi-Scale methods seem to be the most efficient: unlike other methods, they lead to less false positives, but more false negatives.
Ok, now I had some orientation of the existing paths. The next paper “Concrete surface crack detection with the improved pre-extraction” presents a new algorithm to cracks detection (CrackHHP). Fig. 2 shows the result.

It’s really amazing, but the problem project was more specific, more dynamic, harder to detect. So, the next papers worked with Neural Network to detection and segmentation. The paper “Deep Learning-Based Crack Damage Detection Using Convolutional Neural Networks” presented a CNN architecture which is the original configuration for concrete crack detection (Fig. 3). This new approach gives some really good results (Fig. 4).


The paper “Concrete Cracks Detection Based on Deep Learning Image Classification” again using deep learning to concrete crack detection:
The basis for CNN development relies on transfer‐learning, i.e., we build upon a pre‐trained open‐source model VGG16 and use an experimental study to evaluate the influence of training parameters such as learning rate, number of neurons (or nodes) in the last fully connected layer, and training dataset size on the accuracy of the classification model.
But the paper that really got me was the “Semantic Metric 3D Reconstruction for Concrete Inspection” from Robotic Inspection project (Fig. 5).

They introduced the InspectionNet (Fig. 6) architecture to crack and spalling detection:
The InspectionNet is motivated by HED and U-net, and these two deep neural networks are end-to-end fully pixel- level segmentation for edge segmentation.

In this paper, I learned about U-net and most important, they have created the dataset to train, so I would too. Of course, their dataset already has more than 500 images, well defined. Mine would be a small dataset of 100 images, unfortunately.
Project Approach
I really complicated a simple code. All code has been modularized, so I can change the dataset, change the preprocessing of the image, change de neural network architecture.. all by parameters, and of course, the files with the new code and datasets.
So, if we want biomedical segmentation, we can. If we want a road crack segmentation, we can. Concrete crack segmentation, we can. Surface crack segmentation, we can.

Obviously, it was very complex with many possibilities (the results are in GitHub), but a lot of unnecessary complexity for a project. And I only came to learn the concept of Yagni later (I recommend, dear developer).
The dataset
The dataset contained 67 very different images (Fig. 10). Among them, we could group in groups of similarity, like angulation, distance or even by type of material.

No pattern, no labels and worse, no dataset with this style of image over the Internet. With this, the approach was to find more images (to the training set) and create the labels by hand.
It was really hard, but I found 100 images and I took the most varied images on purpose. The labels were created on Gimp (Fig. 11).

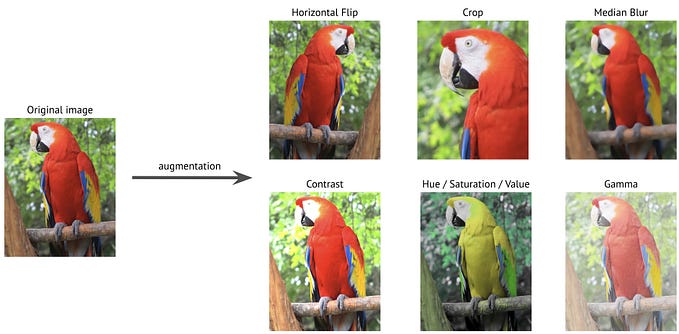
The U-net would be able to segment with only 100 images (the biomedical segmentation was the proof), but for these images, the dataset would have to be bigger. So I made a simple date augmentation to 1,000 images.
Data preprocessing
For data preprocessing, well, a simple binarization wasn't been enough to all images (Fig. 12 a). Then, a series of techniques were applied for all the images could generate a binarization that showed the crack (Fig. 12 b):
- Light equalization;
- Gaussian filter (with kernel 3x3);
- Light and contrast adjust;
- Inversion;
- Erode and dilate functions (with kernel 5x5);
- Finally, Otsu thresholding.

U-net
The paper “U-Net: Convolutional Networks for Biomedical Image Segmentation” give me all that I want. The architecture (Fig. 7) was created to be small and fast (compared to other architectures). At first, it was created for biomedical segmentation (Fig. 8), but I could try, right?


No surprise, but the papers that I found it was to crack detection like roads and bridges, nothing so specific and small to detect as surface cracks in tiles. Did you see this? But, now, I have the knowledge about U-net and the satisfaction that other people have created their own dataset and I would not be the only one. It’s a normal thing in this area (which I had no idea).
For the training process, I really made a lot of mistakes, so I stopped and started from scratch. I think this process took 2 weeks (haha), but remember, I was learning everything at the time and all this I took good advantage to learn other things, like overfitting and underfitting, for example.
Finally, the final training process was realized in a notebook with i7, 16gb ram and a GPU Nvidia 940M with 4gb for about 10 hours (thank you, Lord).
But wait, 10 hours because I had 10,000 diverse images (with data augmentation). Biomedical or concrete crack segmentation, for example, required only 100 images and 30 minutes training (Fig. 13).

Results
In the end, some of the final results. The rest of the images are in my repository (https://github.com/arthurflor23/surface-crack-detection).
I will follow the structure of Fig. 13 (original, preprocessed, overlapped), so:


Conclusions
Don’t think that all the results were good, because they are 67 images in total. Then, this project gave me a lot of knowledge. I never used Python, for real. Ok, maybe the code isn’t the best, whatever.
To finish, I think the dataset was the problem here:
- Few images available;
- Poor images quality;
- Non-standardized images;
- A big and static preprocessing step was necessary.
BUT, the project can open doors, because it’s possible to work across multiple targeting scenarios. Besides, it proved very useful and versatile even with all the odds, don’t you think?
References
- Cha, Y. , Choi, W. and Büyüköztürk, O. (2017), Deep Learning‐Based Crack Damage Detection Using Convolutional Neural Networks. Computer‐Aided Civil and Infrastructure Engineering, 32: 361–378. doi:10.1111/mice.12263
- Liang Yang, Bing Li, Wei Li, Biao Jiang, Jizhong Xiao (2018) Semantic Metric 3D Reconstruction for Concrete Inspection. IEEE/CVF Conference on Computer Vision and Pattern Recognition Workshops.
- Nicolas Coudray, Argyro Karathanou, Sylvie Chambon (2010), Multi-resolution approach for fine structure extraction: Application and validation on road images. International Joint Conference on Computer Vision Theory and Applications, VISAPP.
- Qu Z, Ju F-R, Guo Y, Bai L, Chen K (2018), Concrete surface crack detection with the improved pre-extraction and the second percolation processing methods. PLoS ONE 13(7). https://doi.org/10.1371/journal.pone.0201109
- Ronneberger, O., Fischer, P., & Brox, T. (2015). U-Net: Convolutional Networks for Biomedical Image Segmentation. MICCAI
- Silva, W.R.L.; Lucena, D.S. (2018), Concrete Cracks Detection Based on Deep Learning Image Classification. Proceedings, 2, 489. doi:10.3390/ICEM18‐05387

